
Crafting Crochet Capybaras: A Whimsical Guide to Adorable Amigurumi Creations
The art of amigurumi brings joy to crafters and admirers alike, with its ability to transform simple threads into charming creatures. Among these delightful creations, the capybara stands out as a unique and lovable subject. Known as the largest rodent in the world, the capybara exudes calmness and sociability, making it a perfect inspiration for a crochet project. Whether you’re a seasoned crocheter or a beginner eager to try your hand at amigurumi, creating a crochet capybara offers a rewarding experience filled with whimsy and creativity.
Understanding the Charm of Capybaras in Crochet

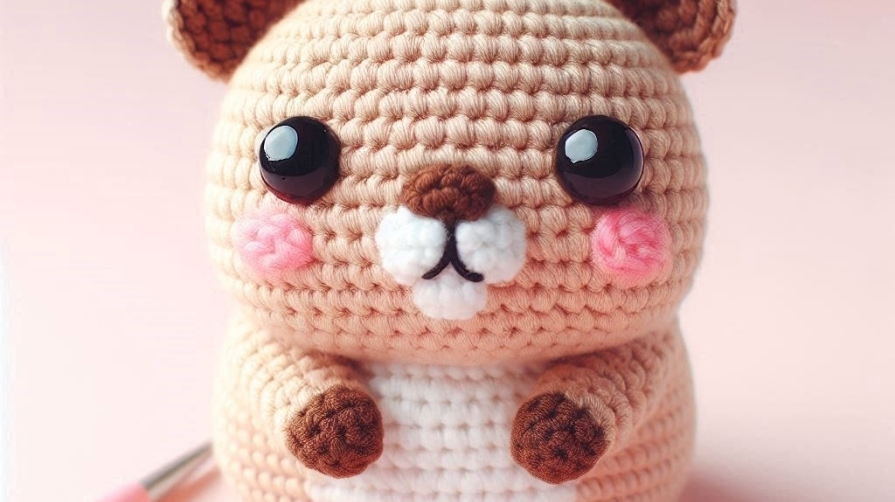
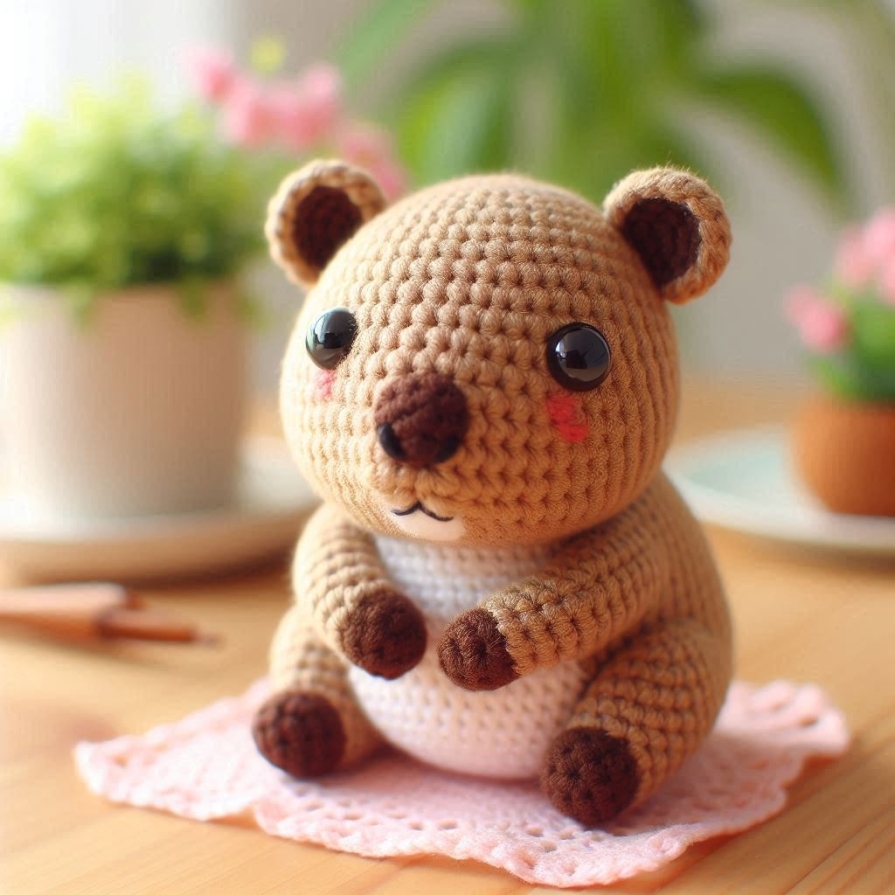
Capybaras, with their gentle demeanor and distinctive features, translate beautifully into crochet designs. Their rounded bodies, short legs, and expressive faces provide the ideal canvas for amigurumi. Capturing their essence in crochet involves a blend of technique, material choice, and a touch of artistic flair. A crochet capybara can be as realistic or as playful as you desire, allowing for endless customization while retaining the animal’s innate charm.
The process of crocheting a capybara offers the opportunity to explore texture and form, as the body’s smooth curves and subtle details require thoughtful crafting. These characteristics make the project engaging for experienced crocheters, while the overall simplicity of the design ensures it remains approachable for beginners.
Choosing the Right Materials and Tools
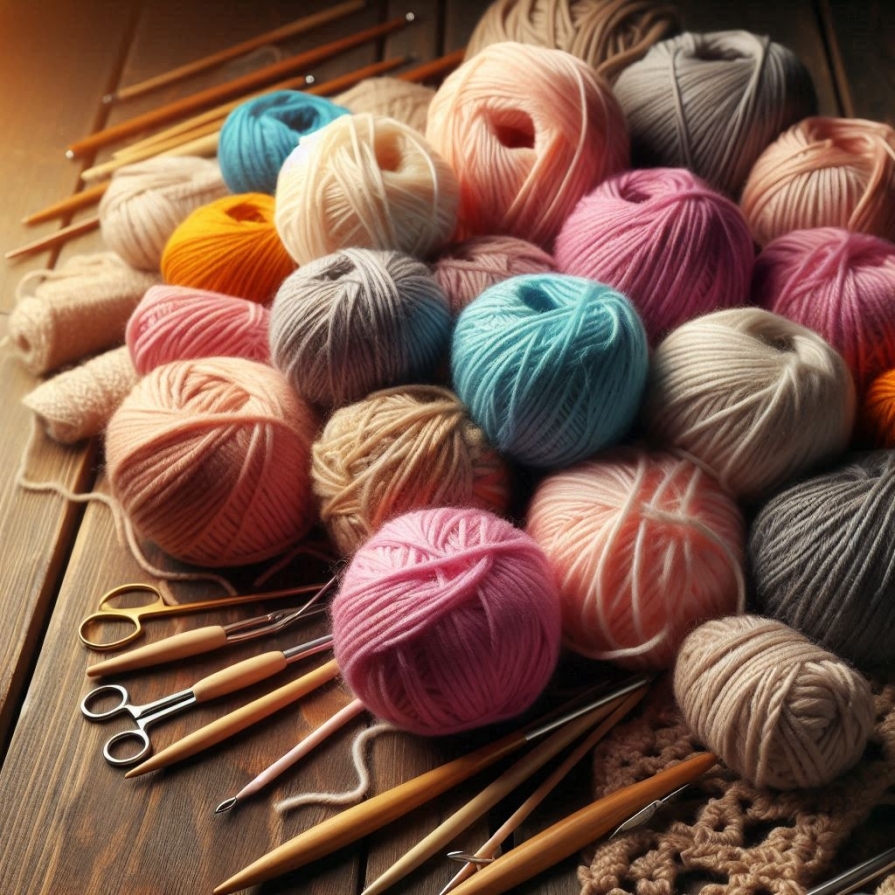
Selecting the right materials is a crucial step in crafting a crochet capybara. Yarn weight and texture significantly influence the final appearance of your creation. For a soft, plush capybara, consider using worsted-weight yarn with a smooth, even texture. Neutral shades of brown, tan, and cream work well for a natural look, while pastel or bold colors can give your capybara a whimsical twist.
The crochet hook size should complement your chosen yarn, ensuring tight stitches that prevent stuffing from showing through. Commonly, a hook size between 3.5mm and 4mm is ideal for amigurumi. Other essential tools include a tapestry needle for sewing parts together, stitch markers to keep track of your progress, and fiberfill stuffing to give your capybara its shape. Optional embellishments such as safety eyes, embroidery floss for facial features, or felt accents can add a personal touch to your creation.
Mastering the Techniques for Amigurumi
Creating a crochet capybara requires familiarity with foundational amigurumi techniques. Starting with a magic ring is essential for forming a neat, seamless beginning. Single crochet stitches are the primary building blocks of amigurumi, and mastering them ensures uniformity and structure in your work. Increasing and decreasing stitches shape the capybara’s body, limbs, and head, giving it dimension and form.
Maintaining consistent tension is vital when crafting amigurumi, as loose stitches can result in gaps where stuffing may peek through. If you’re new to amigurumi, practicing these techniques on smaller projects can help build confidence before tackling the capybara. Following a pattern carefully, paying attention to stitch counts and placement, ensures a smooth crafting process and a well-proportioned final product.
Crafting the Capybara’s Body and Head
The body and head of the capybara form its foundation and are typically crafted as separate pieces. The body is characterized by its elongated, rounded shape, which can be achieved through gradual increases and decreases. Crocheting in a continuous spiral helps avoid visible seams, giving the capybara a polished appearance.
The head is slightly rounded with a gentle slope to mimic the capybara’s distinct profile. Placement of the head in relation to the body is crucial for achieving a balanced and lifelike posture. Ensuring that the stitches are tight and the stuffing is evenly distributed helps maintain the structure and softness of the pieces.
Adding Limbs and Tail

The capybara’s short, sturdy legs and small tail are essential details that enhance its character. Each limb is crocheted separately, usually starting with a magic ring and worked in the round. Slight shaping through increases and decreases creates the desired thickness and length.
Attaching the limbs symmetrically to the body ensures stability, whether your capybara is designed to sit or lie flat. The tail is a simple, understated addition, often crafted as a small cylindrical or oval piece. Positioning it correctly at the back of the body completes the capybara’s silhouette.
Creating Expressive Facial Features
The face is the heart of any amigurumi creation, and the capybara’s calm and friendly expression is a joy to capture. Safety eyes are a popular choice for ease and durability, but embroidered eyes can add a handcrafted charm. Positioning the eyes slightly apart and low on the head mimics the capybara’s natural look.
The nose and mouth can be embroidered using a simple backstitch or satin stitch. Using darker yarn or embroidery floss creates a subtle contrast, making the features stand out. For added personality, consider adding blush to the cheeks with fabric paint or pastel chalk, giving your capybara a warm and friendly appearance.
Assembling and Finishing Touches
Assembly is where your capybara truly comes to life. Carefully sewing the head, body, limbs, and tail together requires patience and precision. Using a whip stitch or mattress stitch ensures secure attachment while keeping the seams as inconspicuous as possible.
Once assembled, take the time to adjust the stuffing and shape the capybara with your hands. Adding optional details like a crocheted bow, scarf, or flower crown can give your creation a unique flair. If gifting your capybara to a child, double-check that all parts are securely attached for safety.
Personalizing Your Crochet Capybara
One of the joys of crafting a crochet capybara is the opportunity for personalization. Experimenting with different yarn colors, textures, and embellishments allows you to create a one-of-a-kind piece. Whether you envision a realistic capybara lounging by a crochet pond or a whimsical version in vibrant hues, the possibilities are endless.
Adding accessories such as a miniature blanket, book, or picnic basket can enhance your capybara’s charm and make it part of a playful scene. Customizing the size of your capybara by using different yarn weights and hook sizes lets you create a family of capybaras in varying scales.
Caring for Your Crochet Capybara
Proper care ensures that your crochet capybara remains a cherished keepsake for years to come. Gentle hand washing with mild detergent is recommended for cleaning, especially if your creation includes delicate embellishments. Allowing it to air dry completely prevents damage to the fibers and stuffing.
Displaying your capybara in a dry, shaded area preserves its colors and prevents dust buildup. If gifting the capybara, including a care note adds a thoughtful touch and helps the recipient enjoy your handmade creation to the fullest.
Embracing the Joy of Crochet Capybaras
Crafting a crochet capybara is more than a creative endeavor—it’s a celebration of imagination and craftsmanship. From selecting materials to assembling the final piece, each step of the process offers an opportunity to infuse your personality into the creation. Whether made as a gift, a keepsake, or a playful addition to your collection, a crochet capybara is sure to bring smiles and spark joy.
The beauty of amigurumi lies in its ability to transform simple stitches into enchanting characters, and the capybara is a perfect muse for this art form. As you embark on your crochet journey, embrace the whimsy and charm of these gentle creatures, and let your capybara creation become a testament to the magic of handmade artistry.
LEAVE A COMMENT
Categories
Recent Posts


0.0333